
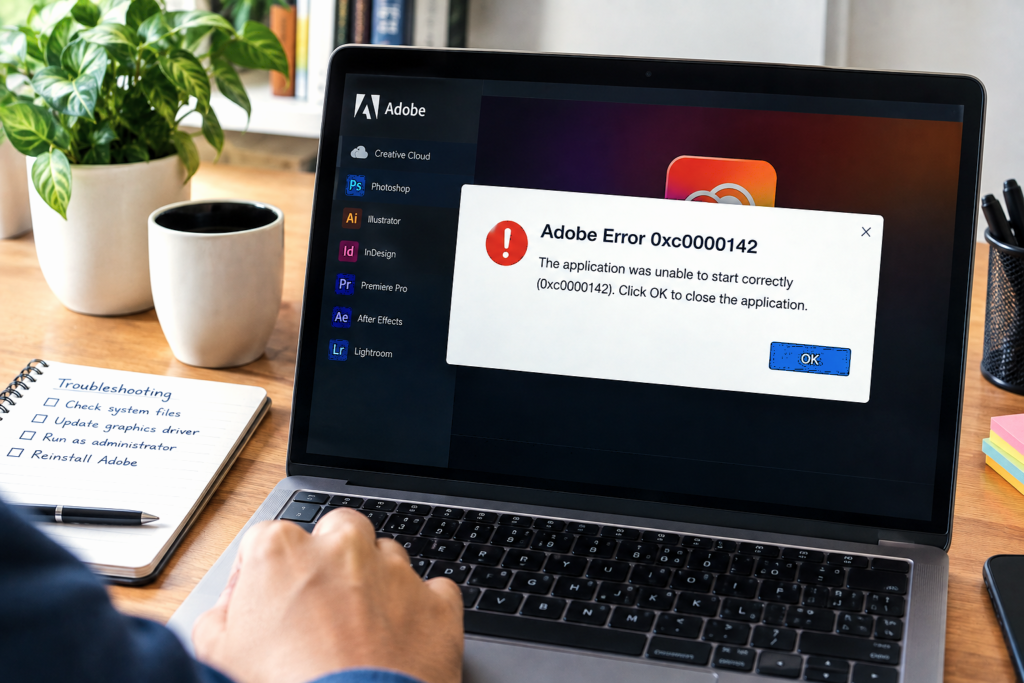
Short answer: Adobe Error 0xc0000142 means “The application was unable to start correctly.” It is a Windows-level DLL initialization failure — one or more of the system libraries Adobe needs at startup is corrupted, missing, or blocked. The most common causes are corrupted or missing Visual C++ Redistributable packages, damaged Windows system files, and security software blocking a DLL at launch. It keeps coming back after reinstalling Adobe because those Windows components are never touched by the Adobe uninstaller — reinstalling Adobe alone does not reach the actual cause.
Error 0xc0000142 has a particular quality that makes it feel severe: it appears at the exact moment you try to open the application, the app vanishes before fully loading, and the error message gives you almost nothing to go on. “The application was unable to start correctly (0xc0000142). Click OK to close the application.” That is all it says — no file name, no specific component, no obvious next step.
What the error code is actually telling you is that Windows tried to load one of the DLL files the Adobe application depends on at startup, and that DLL either returned a failure code during initialization, was not found, or was blocked from loading. DLL stands for Dynamic Link Library — these are shared system files that Windows and applications use to access common functionality. When one that Adobe needs fails to load correctly, the entire application cannot start.
The critical thing to understand is that the broken component is almost never inside Adobe’s own installation. The DLLs that most commonly cause 0xc0000142 are part of the Windows system itself or part of the Visual C++ Redistributable packages that Windows maintains separately from any individual application. Reinstalling Acrobat, Premiere Pro, or any other Adobe app does not repair those — which is precisely why the error keeps returning even after a clean reinstall.
Why Error 0xc0000142 Keeps Coming Back After Every Reinstall
This is the part that trips most people up. Adobe’s uninstaller removes the application files it originally placed on your system. It does not touch Windows system files, Visual C++ Redistributable packages, or DLLs in the Windows System32 folder — those are managed by Windows independently and are shared across many applications.
When the DLL that is failing lives in the Windows system layer rather than inside Adobe’s own folder, uninstalling and reinstalling Adobe puts the same application back onto the same broken system foundation — and it fails at the same point every time.
Error 0xc0000142
Adobe app
remain untouched
the same broken layer
returns
The fix requires repairing the Windows system components — not the Adobe application. Once those are restored, the Adobe app starts working without needing to be reinstalled at all.
What’s Actually Causing Adobe Error 0xc0000142
Corrupted Visual C++ Redistributables
Adobe Creative Cloud apps require specific versions of Microsoft’s Visual C++ runtime packages. If these are corrupted or missing, the DLLs they provide cannot initialize and 0xc0000142 appears.
Corrupted or missing system DLL
A DLL in Windows’ System32 or SysWOW64 directory that the Adobe app depends on may have become corrupted, been removed by a system event, or been replaced by an incompatible version.
Antivirus blocking a DLL at startup
Security software may block a DLL Adobe needs during its initialization sequence, causing it to return a failure code before the app can fully start.
Corrupted Windows system files
Windows file corruption — from an incomplete update, a forced shutdown, or disk errors — can damage the core system files that applications like Adobe depend on.
Corrupted Windows user profile
In some cases, the user profile itself has become corrupted in a way that prevents certain system DLLs from loading correctly under that profile’s session.
Conflicting third-party software
Certain system utilities, cleanup tools, or driver software can interfere with DLL loading by locking, renaming, or modifying shared system files used by multiple applications.
How to Fix Adobe Error 0xc0000142 — Step by Step
Work through these fixes in order. The first three address the most common causes and resolve the error in the majority of cases. Fixes 4 and 5 go deeper into the Windows system layer and are used when earlier fixes haven’t held. Fix 6 covers the user profile scenario, which is less common but worth trying if all else fails.
Reinstall All Visual C++ Redistributable Packages
This resolves the majority of 0xc0000142 cases. Adobe Creative Cloud applications depend on multiple versions of Microsoft’s Visual C++ Redistributable — particularly the 2013, 2015, 2017, 2019, and 2022 versions, in both 32-bit (x86) and 64-bit (x64) editions. If any of these are corrupted, missing, or installed incompletely, the DLLs they provide cannot initialize and the app fails to start.
Step 1 — Remove all existing Visual C++ Redistributables
Press Win + R, type appwiz.cpl, and press Enter to open Programs and Features.
In the search or sort by name, look for all entries beginning with Microsoft Visual C++ Redistributable. There may be many — including different years and both x86 and x64 versions.
Uninstall every Visual C++ Redistributable entry. Work through each one individually — right-click → Uninstall — until all are removed.
Step 2 — Download and reinstall fresh copies
Visit Microsoft’s official Visual C++ Redistributable download page (linked at the end of this article) and download the latest supported bundles. At minimum, download the 2015–2022 versions for both x64 and x86.
Run each installer as administrator — right-click → Run as administrator. Install the x64 version first, then x86.
Restart your computer after all packages are installed, then try opening the Adobe application.
Run System File Checker to Repair Corrupted Windows Files
The System File Checker (SFC) is a built-in Windows tool that scans for and automatically repairs corrupted or missing Windows system files — including the DLLs that applications like Adobe depend on. If a system file has been damaged by an incomplete update, a sudden shutdown, or disk corruption, SFC can often restore it from Windows’ protected cache without requiring a full Windows reinstall.
Press Win + S, type Command Prompt, right-click it in the results, and select Run as administrator.
In the Command Prompt window, type the following command and press Enter:
Wait for the scan to complete — it typically takes 5–15 minutes. Do not close the window or interrupt the process.
Once it finishes, read the result message. If it says “Windows Resource Protection found corrupt files and repaired them” — restart your computer and test the Adobe application. If it says “could not fix some”, proceed to Fix 3 which goes deeper.
Run DISM to Repair the Windows Component Store
SFC repairs files using a local cache called the Windows Component Store. If the Component Store itself is corrupted, SFC cannot complete its repairs. DISM (Deployment Image Servicing and Management) repairs the Component Store by downloading fresh versions of corrupted components from Windows Update. Running DISM before or after SFC gives you the most thorough system file repair available without reinstalling Windows.
Open Command Prompt as administrator (same as in Fix 2).
Run the following command and press Enter:
This process takes longer than SFC — typically 10 to 30 minutes depending on your internet speed, since it downloads replacement components from Windows Update. Keep the window open until it reaches 100%.
Once DISM completes, run SFC again to apply any remaining repairs it can now complete with the restored Component Store:
Restart your computer and try launching the Adobe application.
Check Antivirus Quarantine and Temporarily Disable Real-Time Protection
Security software can block a DLL during the application’s initialization sequence — not because the DLL is malicious, but because its behavior at startup (loading into memory, registering with Windows, writing to protected locations) can resemble patterns that aggressive scanners flag. When that block happens, Windows returns a DLL initialization failure and the application reports 0xc0000142.
Open your antivirus or security software and navigate to its Quarantine or Threat History section.
Look for any items with file paths referencing the Adobe application folder — typically C:\Program Files\Adobe\ or C:\Program Files (x86)\Adobe\ — or referencing System32 or SysWOW64 entries flagged around the time the error first appeared.
If you find quarantined items related to Adobe, restore them and add the Adobe installation folder to your security software’s exclusion list.
As a diagnostic test: temporarily pause real-time protection and try to open the Adobe application. If it opens without 0xc0000142, your security software is the active cause. Add the Adobe application’s folder to the exclusion list, then re-enable protection.
Reinstall the Adobe Application Using the Creative Cloud Cleaner Tool
If the Visual C++ packages and Windows system files have been repaired but the error persists, the Adobe application itself may have corrupted components that the system-level fixes did not address. At this stage, a clean reinstall using Adobe’s Cleaner Tool — which removes deeper residual files than a standard uninstall — gives the reinstalled application a genuinely clean foundation to start from.
Uninstall the affected Adobe application through the Creative Cloud desktop app or through Control Panel → Programs → Uninstall a program.
Download the Adobe Creative Cloud Cleaner Tool from Adobe’s official support website (linked at the end of this article). Run it as administrator and select the affected application for cleanup.
Restart your computer after the cleanup finishes.
Reinstall the application fresh through the Creative Cloud desktop app. Do not restore from a backup of the old installation.
Before launching, confirm Visual C++ Redistributables are installed correctly (Fix 1 if not already completed) and then open the application.
Test With a New Windows User Profile
In some cases, the corruption that causes 0xc0000142 is specific to a particular Windows user profile rather than a system-wide issue. If the error appears for one user but not others on the same machine, or if all other fixes have been applied without success, testing with a fresh user account quickly confirms or rules out a profile-level issue.
Go to Settings → Accounts → Family & other users → Add someone else to this PC on Windows 10, or Settings → Accounts → Other users → Add account on Windows 11.
Create a new local administrator account.
Sign out of your current account and sign in to the new one.
Try launching the Adobe application under the new profile.
If the application launches successfully under the new profile, your original user profile is corrupted at a level that is affecting DLL loading. You can either migrate your work to the new account or use a Windows Profile repair procedure to restore the original profile’s integrity.
Quick Reference — Match Your Situation to the Fix
| What You’re Seeing | Most Likely Cause | Start With |
|---|---|---|
| Error on first launch, appeared after Windows Update | Windows system file corruption from an incomplete update | Fix 2 (SFC) then Fix 3 (DISM) |
| Error returns after every reinstall of Adobe | Root cause in Windows layer, not Adobe files | Fix 1 (Visual C++) then Fix 2 and Fix 3 |
| Error appeared after installing new security software | Antivirus blocking a DLL at startup | Fix 4 (check quarantine, test with AV off) |
| Error on some Adobe apps but not others | Specific Visual C++ version missing for that app | Fix 1 (reinstall all VC++ Redistributables) |
| Error only under one Windows user account | Corrupted Windows user profile | Fix 6 (test with new user profile) |
| SFC says it “could not fix” some files | Corrupted Windows Component Store | Fix 3 (DISM) then Fix 2 again |
| All system fixes applied but error still shows | Deep Adobe installation residue on repaired system | Fix 5 (Cleaner Tool + fresh reinstall) |
Common Variations
Error 0xc0000142 appears on multiple Adobe apps at the same time
When more than one Creative Cloud application shows 0xc0000142, it almost always points to a shared dependency — specifically the Visual C++ Redistributable packages or a Windows system DLL used by all of them. Fix 1 (reinstall all Visual C++ versions) followed by Fix 2 and Fix 3 addresses the shared root cause and typically clears the error across all affected apps at once.
Error appeared immediately after a Windows feature update
Major Windows feature updates (like a version upgrade from 22H2 to 23H2) sometimes replace or reset DLLs in ways that break existing Visual C++ Redistributable registrations. Running SFC and DISM after a feature update is a reliable way to catch and repair this class of issue. If the error appeared within a day or two of a Windows update, start with Fix 2 and Fix 3.
Error 0xc0000142 on Photoshop or Premiere Pro specifically, not Acrobat
Different Adobe applications depend on different versions of Visual C++ Redistributables. If the error appears on one app but not others, the specific Visual C++ version that app requires may be the one that is corrupted. The fix is the same — reinstall all versions — but the diagnosis narrows the search to a specific package version if you want to investigate further.
Error 0xc0000142 on a freshly installed Windows or a new PC
On a brand-new Windows installation, 0xc0000142 most commonly indicates that the Visual C++ Redistributables were not installed as part of the initial Windows setup, or that a specific version the Adobe application needs was not included. This happens more often with minimal or custom Windows installations. Fix 1 is almost always the complete resolution in this scenario.
Error persists even after completing all six fixes
In rare cases where 0xc0000142 survives all the fixes above, the most thorough remaining option is a Windows repair upgrade — reinstalling Windows in place using the Windows 11 setup media while keeping your files and applications intact. This replaces all Windows system files without the disruption of a fresh install. As a first step before that, running a disk health check using chkdsk /f /r in an elevated Command Prompt is worth doing — disk errors can corrupt system files faster than SFC or DISM can repair them.