
How To Face Swap in Adobe Photoshop– Photoshop, the industry-standard image editing software, isn’t just for retouching and enhancing photos. It’s also a powerful tool for creating fun and imaginative compositions. One such creative endeavor is face swapping—the art of seamlessly replacing one person’s face with another.
Read: How to Make Contact Sheet in Photoshop – Easy Steps
Whether you want to fix a group photo, create hilarious memes, or simply explore your artistic side, this tutorial will walk you through the process step by step on how to face swap in Adobe Photoshop.
Step To Face Swap In Adobe Photoshop
Certainly! Let’s start with the step-by-step process for face swap in Adobe Photoshop:
1- The Basics: Swapping Faces with Layer Masks
When you have two images—one with the original face and another with the new face you want to use—follow these steps:
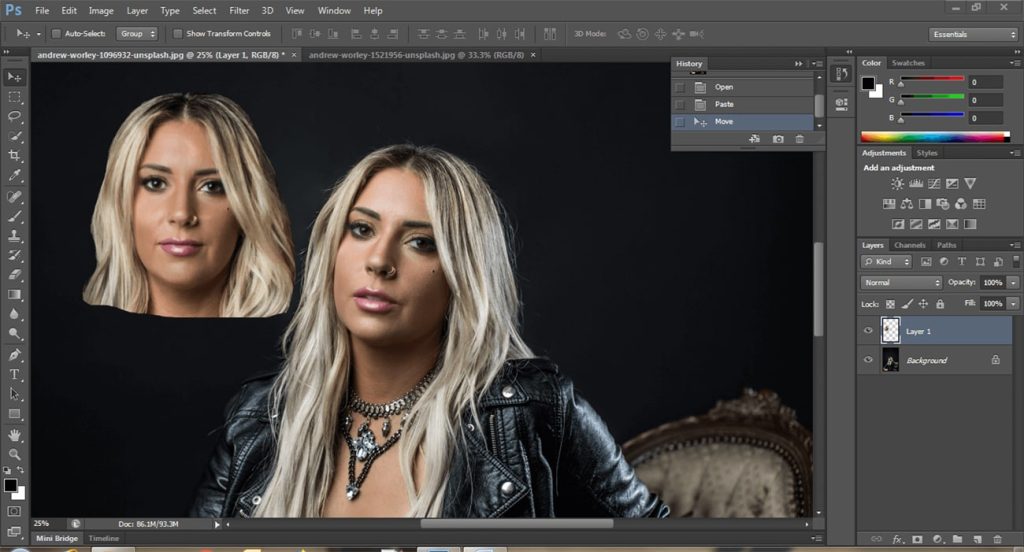
- Import Images: Open both images in Photoshop. Place the image with the new face as the bottom layer and the main photo as the top layer.
- Align the Faces: Use the Auto-Align feature to ensure the faces roughly align.
- Layer Mask Magic: Add a layer mask to the top layer (your main image). Set the opacity to 100%.
- Brush It In: Select the Brush tool with 100% opacity. Paint over the face you want to swap out on the layer mask. The face beneath it will show through in real time.
This method works best when the images are similar in size and composition. But what if you need something more complex, like a cat face swap or meme creation?
2- Advanced Techniques: Face Swapping with Object Selection
Photoshop’s Object Selection tool gives you more control:
- Select and Drag: Use the Object Selection tool to grab the face you want to swap.
- Resize and Align: Gradually resize and align the features with the original face.
- Opacity Adjustment: Turn down the opacity of the face layer to see the original features underneath.
- Fine-Tuning: Match the eyes, nose, and mouth, and move the new face into place.
3- AI-Powered Face Swaps: Generative Fill
Photoshop’s AI Generative Fill takes face swapping to the next level:
- Complex Areas: Use AI Generative Fill for tricky areas like hair and overlaps.
- Group Photos: Fix group photos effortlessly.
- Step-by-Step: Follow our tutorial to master this advanced technique.
Conclusion
Whether you’re a photography enthusiast, a social media lover, or just someone who loves to experiment, face swaps in Photoshop offer endless possibilities. So swap faces, create magic, and let your creativity run wild!
Remember, with Photoshop tools, no one will know your bestie wasn’t smiling in that trip pic. Happy face swapping!